Circle of Stitches

Purveyors of fine yarns and witchy goods

Making a Deck Your Own: Part 1: Trimming

Catherine FaheyComment

You just bought a tarot deck, and you love it. 

Except, maybe, one thing doesn’t resonate with you. 

Maybe it’s too large for your hands and it’s difficult to shuffle. Or you don’t like the borders. 

Or perhaps you want to make it more your own. 

Some people believe that you shouldn’t change a deck at all. Others think that a deck is a tool, and tools should be used, and if they can be made better (more useful), they should. I’m firmly in the latter group. If you have a deck that languishing and gathering dust for want of a few modifications, then make those modifications so that you can use your deck!

Tarot, is after all, just pretty pictures on paper. And it’s easy to transform paper.  Scissors, glue, tape, stickers, glitter, contact paper, hole punches… there are so many ways! There’s a wonderful Facebook group called  Tarot with Scissors: Deck Modification, Crafts, and Art. Members share their projects, tools, and techniques. I’ve spent hours looking at their creativity. 

Two of the most popular modification are trimming and edging. Trimming is where you cut a deck down to a different size (usually cutting off the borders) and edging is coloring in the edges of a deck with marker or ink.  I haven’t felt the need to edge a deck, but I’ve trimmed a few.

Trimming is one of the easiest things you can do to a deck. You can do it with scissors. Here I am using regular scissors to cut along the line (takes me back to elementary school art class). I’m trimming the 10 of Cat Treats (Pentacles) from the Cat Tarot by Megan Lynn Kott.

IMG_2548.jpeg


You’ll get a neater edge, and it’ll be easier on your hands,  with just a few tools: an X-Acto knife, a metal ruler, and a self-healing cutting mat. This time I’ll trim the 7 of Cat Toys (Wands)

IMG_2541.jpeg

Line up the ruler with the edge of the artwork on the card. Using firm pressure on the ruler to hold the card in place, cut next to the ruler with the knife. 

IMG_2542.jpeg

The card will have square edges. You can leave them, but if you want rounded edges, you can use scissors, or buy a corner punch.  

IMG_2545.jpeg

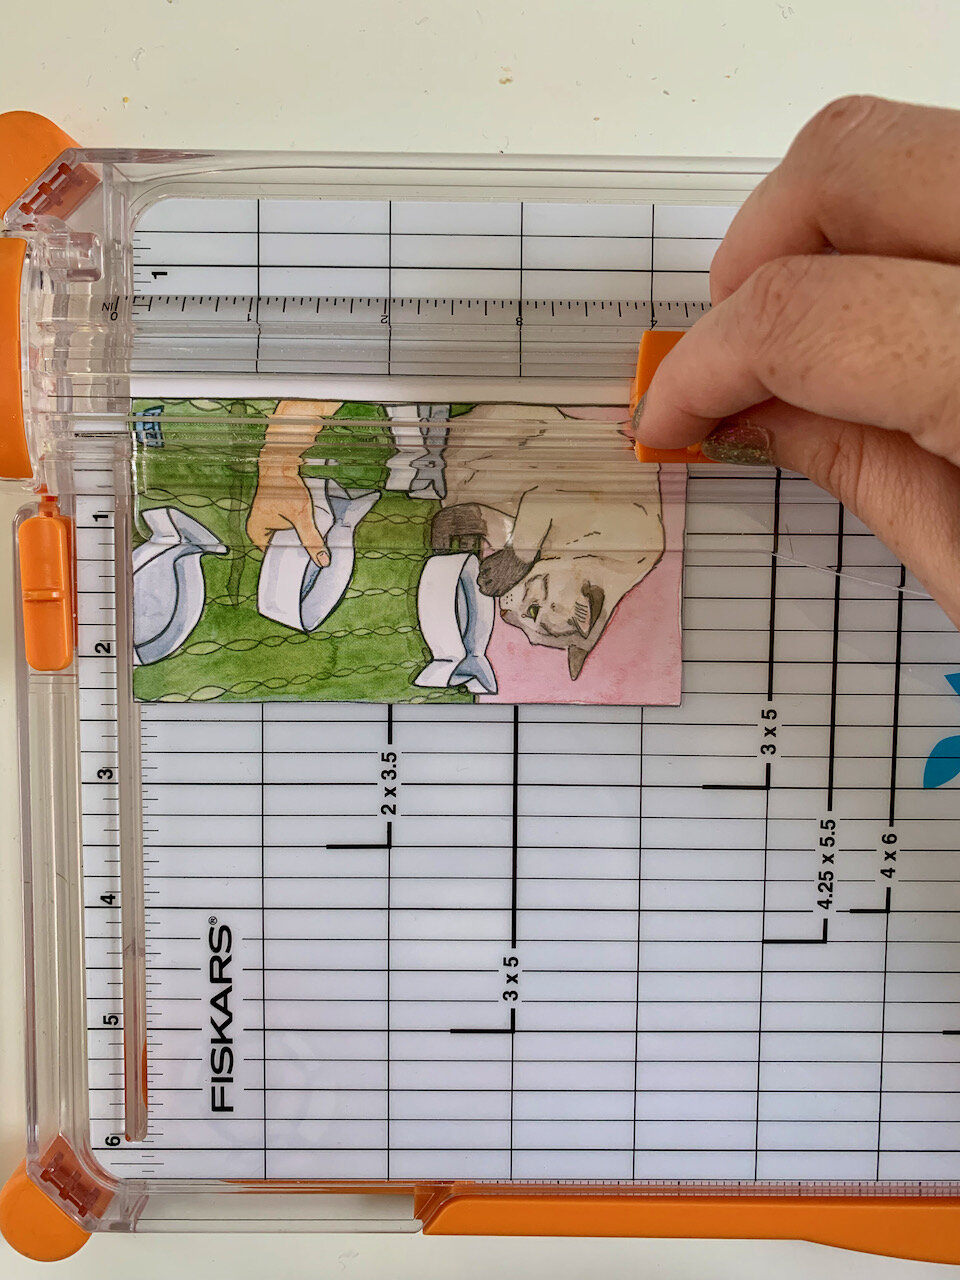
If you decide you like trimming decks, you may want to get a paper trimmer, or even a guillotine. Depending on the thickness of the cards, you can cut multiple cards at once with a trimmer or guillotine. I’m trimming the 4 of Cups. 

IMG_2550.jpeg


The Cat Tarot is a standard size tarot deck measuring 4.75” x 2.75” (120 mm x 70 mm). Once the borders are trimmed, it measures 4.33” x 2.33” (110 mm x 60 mm). 

IMG_2547.jpeg


Have you modified a deck? What have you done to make a deck your own? 

Next time, I’ll share a more extreme deck modification. 
Embracing Slow Stitching: Re-Calculating Sleeve Decreases for Better Fit

Ana CamposComment

Making our own clothes means we get to create bespoke pieces that fit our bodies just the way we want. I find this process to be empowering, and an act of resistance all on its own. That said, this often means having to adjust patterns and sometimes, it means re-knitting pieces when we get an unexpected result.

When swatching for a project, it’s important to swatch flat for projects knit flat, and in the round for projects worked in the round. Our gauge can differ, because when we work stockinette flat, it involves both knit and purl rows. Stockinette in the round is all knit rows. There is a slight difference in the amount of yarn used in creating a knit stitch versus a purl stitch because of how we wrap the yarn to create them (yes, even though it’s just the same stitch backwards). So this means that we can see a gauge difference in a cardigan when we are working the body flat, and the sleeves in the round.

When working my Comfort Fade cardigan, I first worked my sleeves as written and ended up with sleeves that didn’t fit right, and it’s because of my gauge difference between flat and in the round. Switching to in the round for the sleeves made my row gauge looser. Instead of having 8 decrease rounds total as written in the pattern, I ended up with 6 decrease rounds by the time I reached the 15.5” sleeve length called for. I decided to go with this and knit my cuff, only to find in the end I wasn’t happy with the fit. This cardigan is intended to fit with little ease on the sleeves, and this left me with very baggy sleeves past the elbow.

This is one of those moments where I had to remind myself of the joys of handmade clothing and slow stitching. I could either leave the first sleeve as is, knit the second to match, and spend years being cranky every time I put on this sweater that the sleeves didn’t fit quite right. (and yes, I’d be unhappy every. single. time. I wore it, like with the pair of socks I fudged back in 2014, I still haven’t forgiven those socks)

So I decided to rip the sleeves out and recalculate the decreases - and I’m sharing the process so it can help some of you along the way too!

My original sleeve had:

  • 6 decrease rounds every 17 rounds, plus 3 more rounds to reach 15.5”.

  • The cuff added an extra 3.75” for a total sleeve length of 19.25”.

  • That makes a total of 105 rounds, at a gauge of 27 rounds = 4” (pattern) gauge was 32 rounds = 4”

Since I was modifying the sleeve anyway, I decided to take out an inch in total length.

My new sleeve had the following parameters:

  • 18.25” total length, with a 3.75” cuff.

  • 14.5” before the cuff to accommodate 8 decrease rounds. I actually decided to add 2 more decrease rounds for a total of 10, to remove a bit extra ease along my forearm.

  • At 27 rounds = 4”, 14.5” of length gives me 98 rounds to accommodate 10 decrease rounds

  • 98 rounds divided by 10 is 9.8 rounds. I rounded down to 9 rounds.

My new sleeve will be knit as follows:

  • Decrease every 9 rounds a total of 10 times (90 rounds worked)

  • Knit 8 more rounds even, for a total of 98 rounds worked before starting my cuff.

So I’m going to take deep breath, sip my Queen of Wands tea, and remind myself that I love knitting, and it’s totally okay to spend another week reknitting this sleeve. Now time to rip out the original sleeve….

Pattern: Comfort Fade Cardi by Andrea Mowry
Yarn: La Bien Aimee Merino DK

DSC_1829-2.jpg

Tarot Journaling

Catherine FaheyComment

I’ve been journaling since I was 12 years old, and my 7th grade English teacher Mrs B got me into the habit. She started every class with 10 minutes of writing. Sometimes there was a prompt, sometimes it was free writing. We were expected to write, and every few weeks she’d check our journals for quantity, not for content. That wiring practice has served me well throughout my education and professional life. 

Some years I’ve kept diaries, some years I’ve tried Bullet Journaling or other productivity methods. I’ve tried to keep different notebooks for different things: one for work, one for creative writing, one for tarot, one for dreams. But the pandemic has shown me that I work best when I have one notebook going at a time, and I use it for everything. I’ve been journaling for 30 years, and I have 51 notebooks filled. 

Along the way of learning to be the best journaler I could be, I tried a lot of different ways to keep track of tarot cards and spreads. 

I’m not an artist- I can’t draw. I’m a writer. So my journaling reflects that. But I needed to find a way to record spreads. For a while, I used the Day One app to keep track of spreads, where I found the spread, and the reading I did. I liked this, for the visuals and the ability to tag entries, and to get “on this day” style reminders. But I’m not as prolific a writer on my phone, and they went from a pay once to a monthly subscription model, so I’m not using that any more. 

dayonescreeenshot


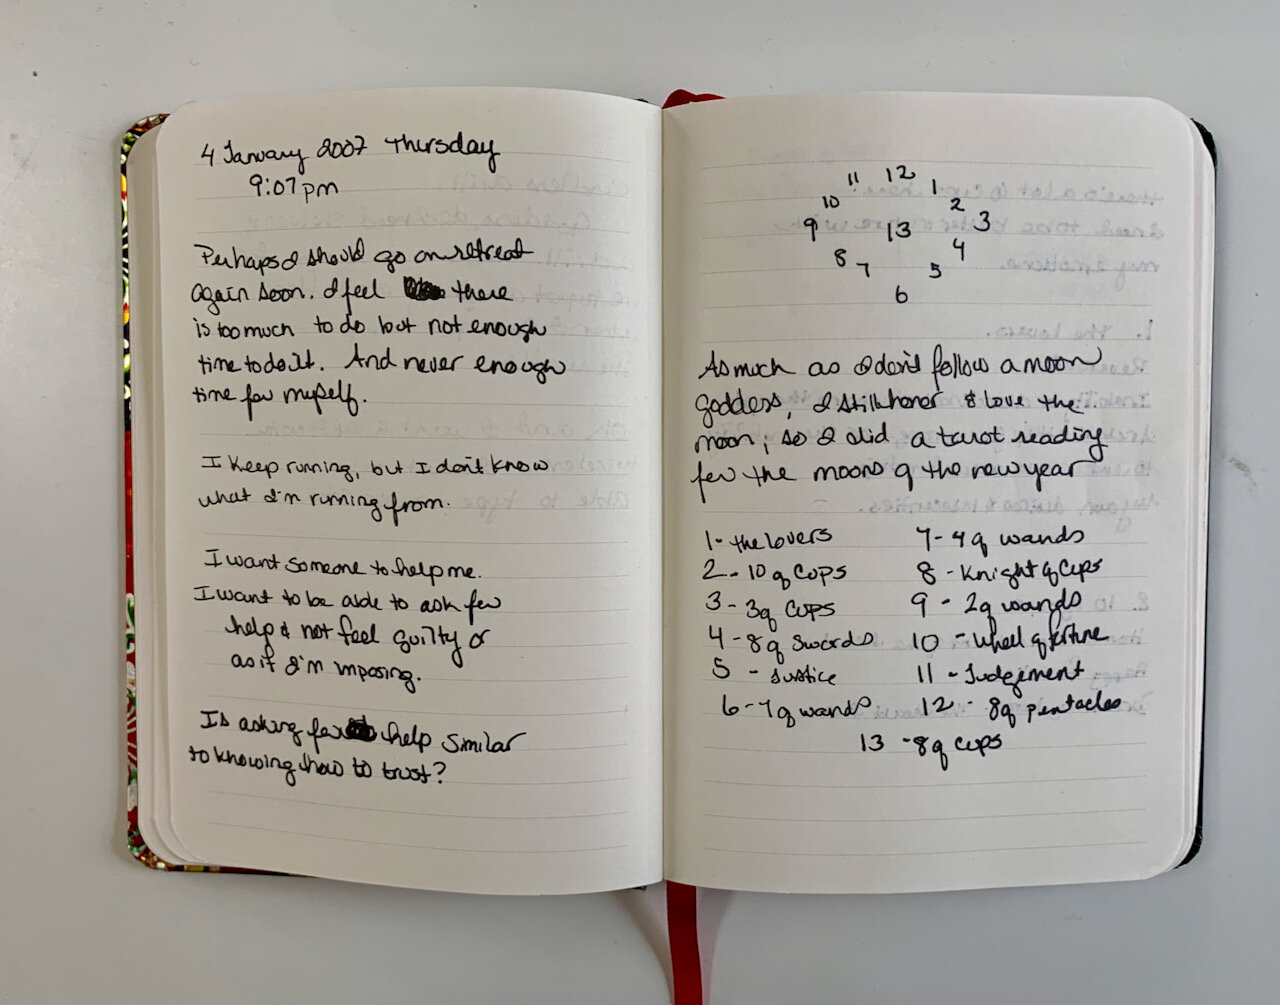
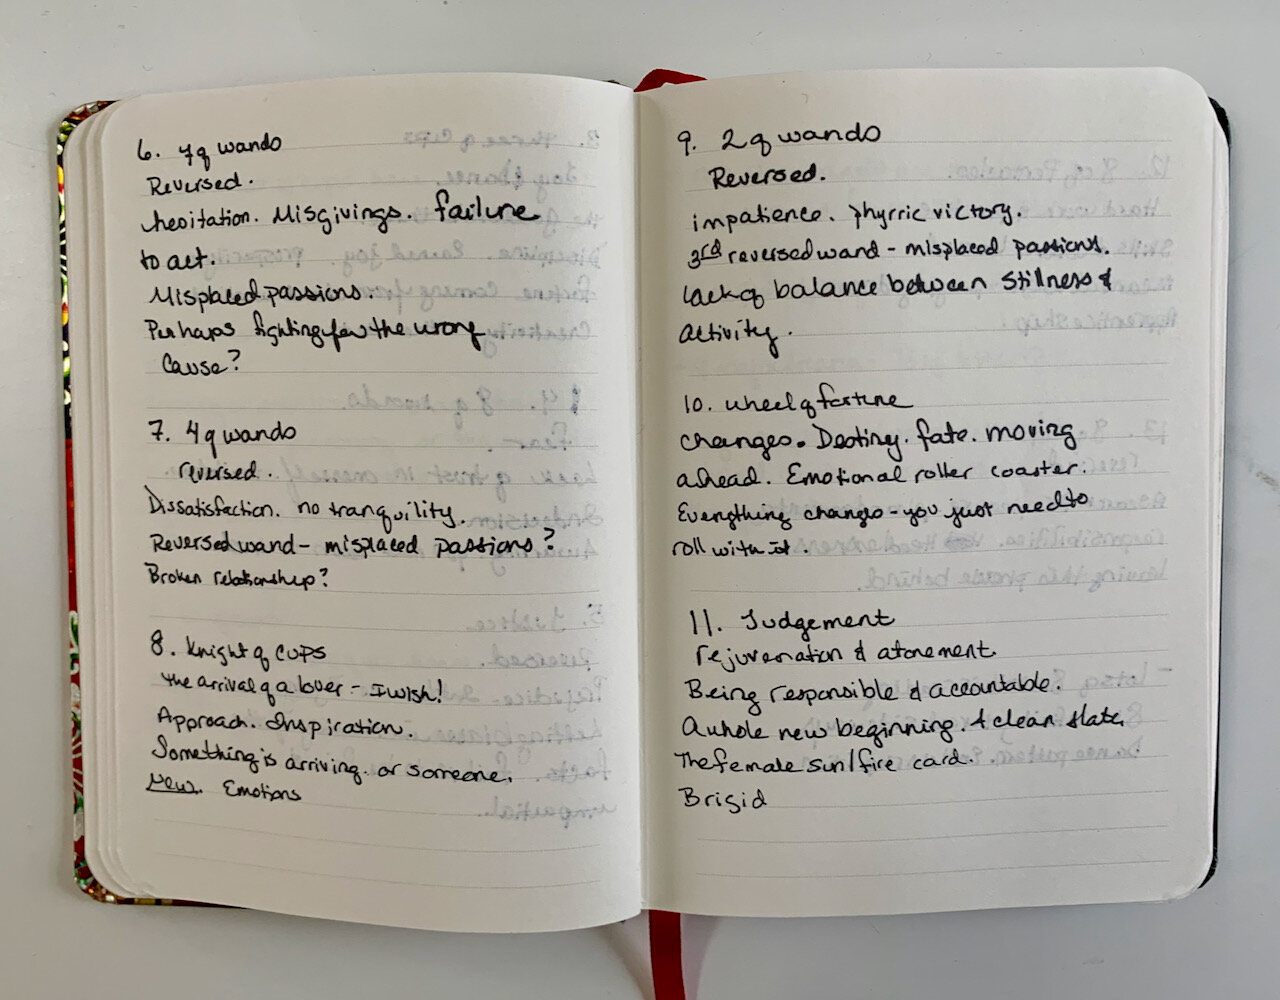
I map out the spread with numbers to show the shape of the spread, and then I list the cards. Then I go through and write down the individual meanings and impressions and finally I synthesize the meaning. This has been consistent practice for me over the years.  Here’s a reading from January 2008 showing this technique. 

Over the years I’ve also tried to maintain a daily draw practice. I also had an Instagram account where I posted my card of the day. Every morning I’d pull a card and take a photo, and then write a few words while waiting for my coffee to brew. But I got too caught up in chasing likes, and it felt too performative. So I deleted that account. 

For a while I had dreams of data analysis so I kept a spreadsheet of my daily cards. That became a chore.  And I never got enough data to do any cool graphs. 


Eventually I realized that I love analog journaling. I prefer the feel of pen on paper (especially if I’m using one of my fancy fountain pens).  So late 2020 I ordered the Many Moons 2021 Lunar Planner. There’s just room for only a few lines, so the planner doesn’t generate pressure or performance expectations. 

IMG_2562.jpeg


I keep this planner, pen and the deck I’m using that month on my night stand. Every night before bed, I draw a card and write a few sentences about what happened that day. The small daily space doesn’t give me the fear of a blank page, and I don’t feel the need to go on and on to fill up space. I just clear my mind, shuffle and draw a card, and then write it down, along with a few words about the day. It’s a small ritual of putting the day behind me so I can go to bed. This is working better for me than any other daily tarot practice. 

Do you keep a tarot journal?  How do you keep track of readings or daily practice? 

The Comfort Fade Cardi: Falling in Love with La Bien Aimee

Ana CamposComment
Photo courtesy of La Bien Aimee

Photo courtesy of La Bien Aimee

As a shop owner, there are fiber artists who I dream of working with. Aimee Gilles, the creator behind La Bien Aimee, is one such artist. I’ve followed Aimee’s work for a few years, and I am always looking for opportunities to support fellow BIPOC makers. I had seen Aimee’s Merino Singles in person before, but hadn’t seen her Merino DK until boxes brimming with absolutely stunning La Bien Aimee yarn arrived at our door last week. Since then, I have fallen deeply in love with this yarn.


Maybe you’ve heard of Andrea Mowry’s Comfort Fade Cardi. I had seen it, but honestly hadn’t looked too closely since La Bien Aimee was still a distant dream. But as soon as we opened the boxes, folks came down to the shop to pick color palettes to make their own cardis!

Photo courtesy of La Bien Aimee

Photo courtesy of La Bien Aimee

After we helped several folks pick beautiful fade sets, I just couldn’t resist anymore and had to create my own fade. Of course I had to cast on immediately, and at that point I fell hopelessly in love.

Aimee’s colors are stunning, with subtle layering and the most beautiful array of speckles. I could tell the yarn was soft in the skein, but once I got it on my needles, I couldn’t believe the softness. Aimee’s Merino DK has a gorgeous hand. It’s smooth, super soft, with crisp stitch definition, and of course, stunning colors. I am absolutely mesmerized watching the colors dance back and forth on my needles. In fact, I can’t wait to wrap up this blog post so I can go back to knitting it!

My fade: Ayre, Dusk, Fauna, Loam

My fade: Ayre, Dusk, Fauna, Loam

Andrea describes this cardigan as your own canvas for painting with yarn, and it truly looks like you’re knitting your own watercolor painting. Below are some of the combinations we’ve put together so far, but the possibilities are endless! If you’re feeling inspired, come on over (in person or virtually) and let us help you put together your dream palette!

Andrea’s original fade: Vespa Graffiti, Vespiopeia, Drea, Cassiopeia

Andrea’s original fade: Vespa Graffiti, Vespiopeia, Drea, Cassiopeia

Ana’s fade: Ayre, Dusk, Fauna, Loam

Ana’s fade: Ayre, Dusk, Fauna, Loam

Melanie’s fade: Fauna, Siena, Dusk, Doe

Melanie’s fade: Fauna, Siena, Dusk, Doe

Knitting Tip: Avoid a Gap When Binding Off Mid-Row

knitting, knitting techniquesAna Campos3 Comments
3.jpg

You’re happily knitting your bottom-up sweater, and you finally get to the neck shaping. You knit along your row and start binding off for the neck and there it is… the pesky gap. If you’re anything like me (a completely neurotic virgo), the asymmetry of the mid-row bind off makes you a little uneasy. The good news is the fix is super easy!

4.jpg
5.jpg

Knit to 1 stitch before where you’re going to start your bind off (shown with a marker in the photo above). You’re going to kfb (knit in the front and back loop) of the next stitch (the stitch before the bind). This will give you an extra stitch to bind off, and will make your neck shaping clean and symmetrical!

That’s it! Start your bind off with the extra stitch from the kfb for a cleaner neckline!

6.jpg